Activities
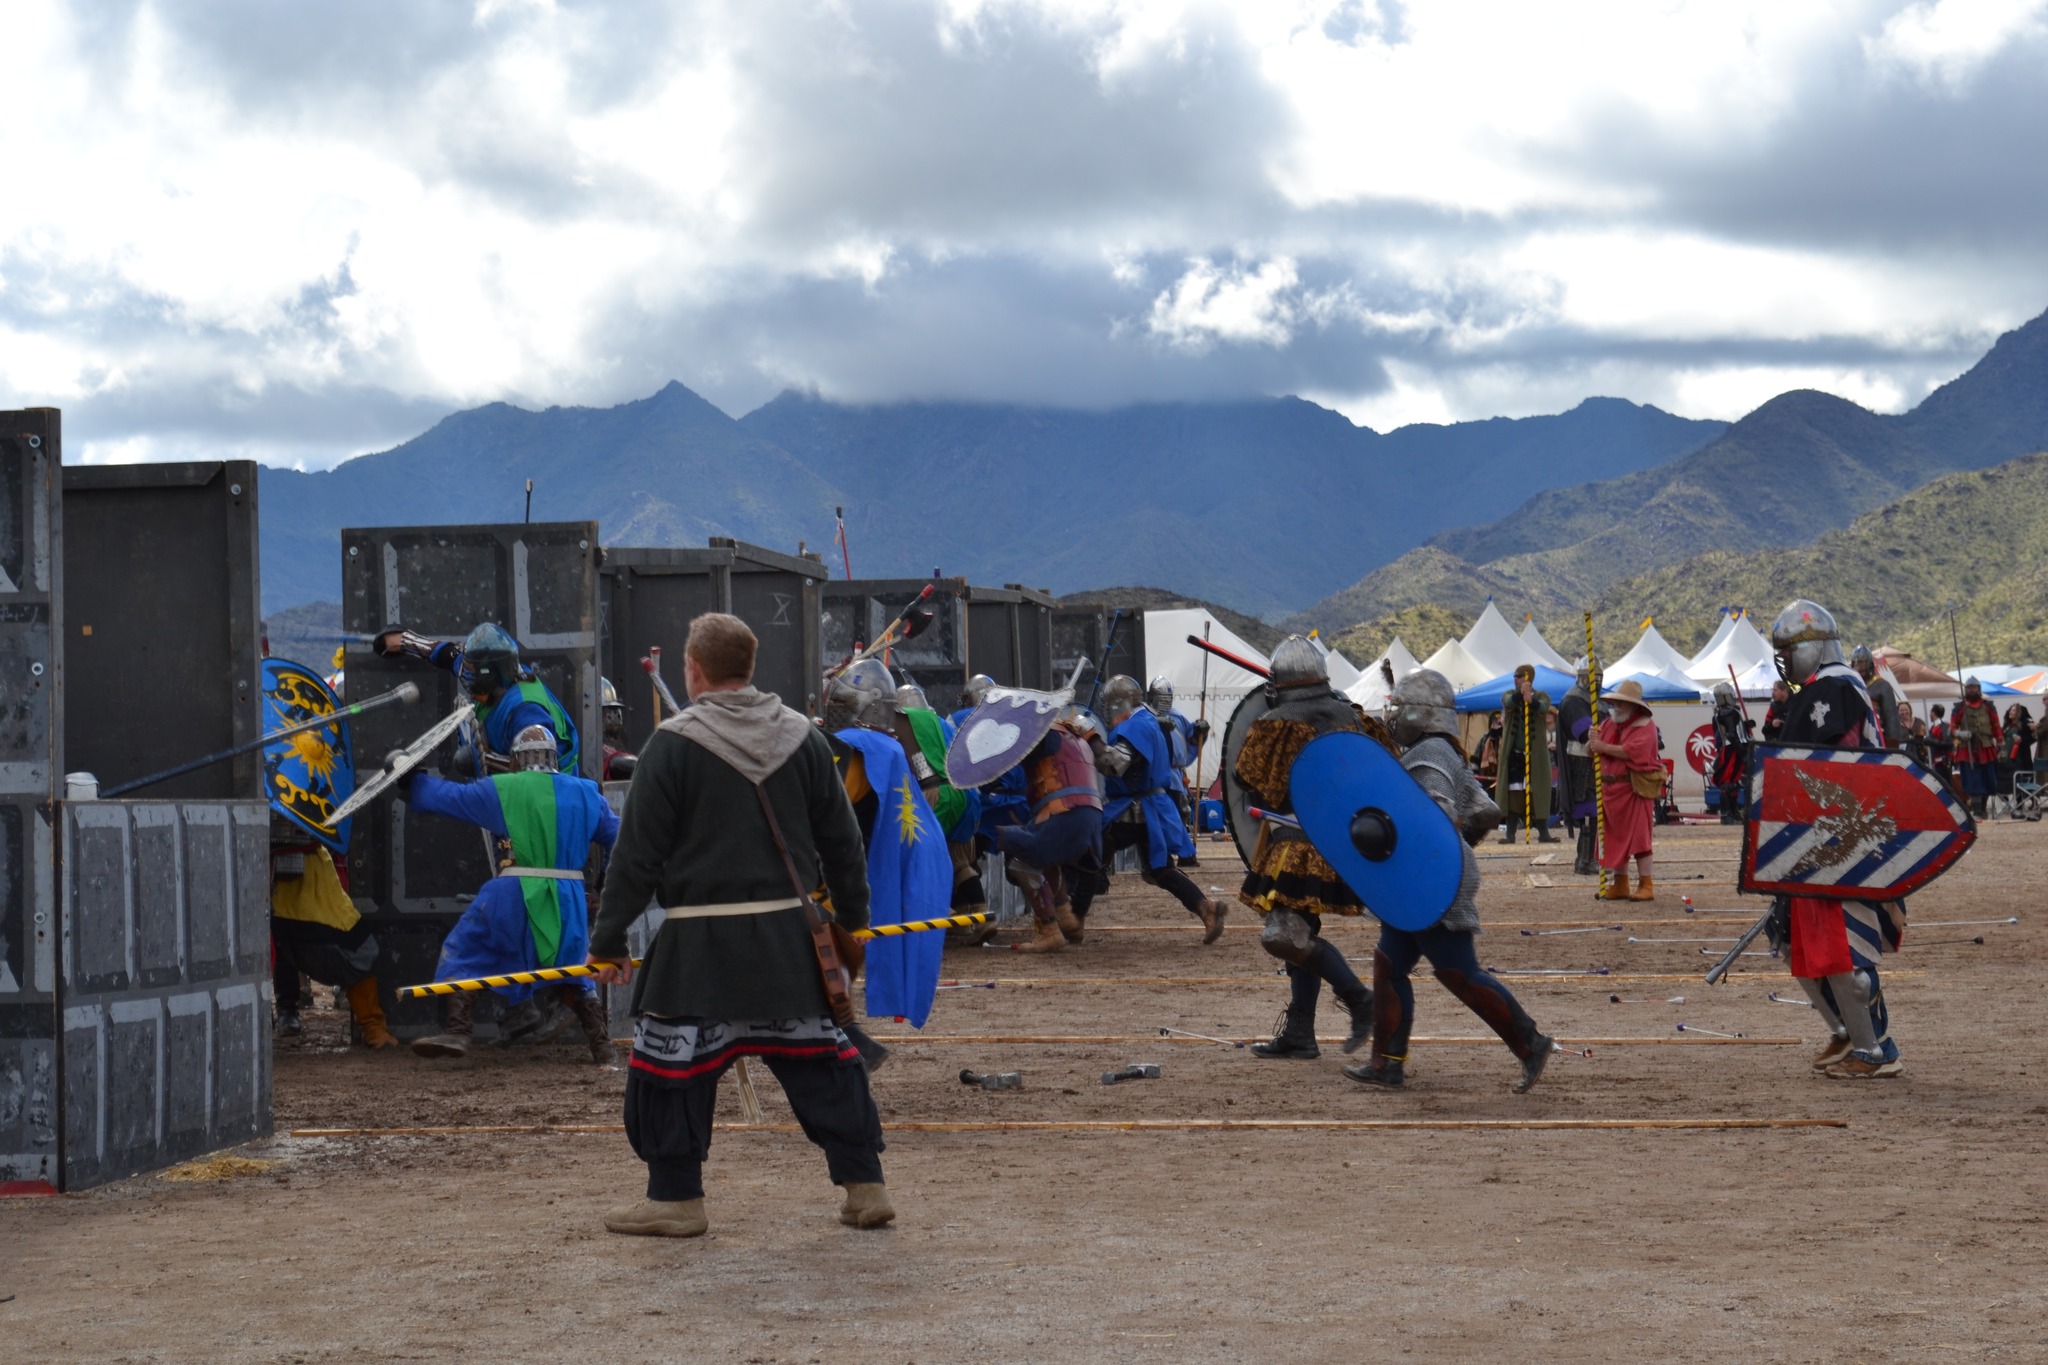
Hardsuit Battlefield Scenarios
Download the Saturday Scenarios.
General Information
- All fighting conventions and weapon standards will adhere to Atenveldt Standards.
- Visiting kingdom armor requirements will be honored.
- Quick resets! Keep your tops on! Each battle will begin immediately following the end of the battle before it. Enough time will be given to quickly glean used arrows.
- Each side will run scenarios 2 twice on the same side. Armies will then switch sides and run
the scenario two more times. - Hats off between scenarios.
Combat Archer Information
- Combat Archery is permitted in all battles along approved firing lanes.
For Scenarios 2-4 ONLY
- The number of arrows that each combat archer is permitted will continue from Friday’s
battles. - All caches will follow the same rules as scenarios on Friday.
- Arrow inspection will only occur after scenario 1 and after each instance of scenario 4 being run.
Siege Engine Information
- Siege engines will be permitted in scenarios 2, 3 and 4
- Ammo limitations are TBD based upon turnout.
- Siege engines may only fire to the east.
- Hitting or striking a siege weapon is strictly prohibited!
- All siege engines will have a corresponding target/object approximately 10 – 15 feet in front of it that must be struck with a melee weapon to disable the siege engine.
- The target needs to be appropriately sized, i.e. a haybale
Scenario 1: Open Field
Duration: Last man standing / 10 minute maximum, 3 times, 45 minutes max.
Field Setup:
- Army A begins on the East side of the field; Army B begins on the West side of the field.
- The entire field is available for fighting.
Description:
- Open field battle, last man standing
- Warm up / allow people to arrive.
- Balance sides at the end if needed / desired.
Scenario 2: Bridge/Towers
Duration: Run 4 times, approximately 10 minutes each, 45 minutes total w/ resets.
Field Setup:
- 3 bridges, 20 – 30 feet long, outside bridges are 10’ wide, the center bridge is 30’ wide.
- 2 10×10 towers in between the bridges on the defender’s side of the river.
- There should be a 10’ wall in between the center bridge and the towers.
- The defender’s backfield is open.
Description: The army that wins Rapier Scenario 4 on Friday will determine if they want to attack or defend
first.
Weapon rules:
- Left bridge: Mass weapons and spears are prohibited (acceptable styles Sword and
Shield, florentine, madu, etc.) - Center bridge: Mass weapons only
- Right bridge: Spears only
- Archers may only fire down the center bridge, they cannot shoot over the sides of the
bridges. No melee combat over the sides of the bridges.
Tower rules:
- Archers inside the towers can fire at targets on the bridges to either side of the tower.
- Archers in the attacking army can target archers in the towers without restriction.
- Each tower has 2 siege engine targets, once they are both hit the tower is destroyed.
- When a tower is destroyed, all combatants inside the tower are immediately killed and the river in front of the tower becomes a ford with a 5’ door in the center of the wall that attackers can enter through
- Unbelted fighters may only cross the ford on their knees.
- If there are no siege engines – attacking archers can fire along all three bridges, defending archers can only fire along the center.
- When a tower is destroyed, all combatants inside the tower are immediately killed and the river in front of the tower becomes a ford with a 5’ door in the center of the wall that attackers can enter through
Victory condition:
- The attacking army begins with XX resurrections
- The exact number of resurrections is TBD based on event turnout.
- The results of the first archery scenario on Friday will reduce this number
- Battle will convert to last man standing after resurrections are exhausted
Scenario 3: Town
Duration: Run 3 to 5 times, 10 minutes each, 45 minutes total
Field Setup:
- Field is anchored in the 4 corners by 10×10 redoubts
- 20×20 building in center of town that has multiple doors/windows
- Random small buildings and walls are throughout the town
Description: Each team will have 2 unique caches/flags that they must get into the corresponding redoubts
that are nearest the enemies starting area.
Victory condition:
- The first team to get both flags into the corresponding redoubt on the opposing side of the field
wins the battle. - First team to win 3 battles determines starting sides for the final scenario
Scenario 4: Castle
Duration: Run 4 times, approximately 10 minutes each, 45 minutes total w/ resets.
Field Setup:
- The main gate is 15-20’ deep x 30’ wide and has a portcullis.
- Portcullis should be represented by a soft barrier that can be easily dropped/lowered,
approximately 3 feet on either side of the gate.- A cone that can be knocked over for instance
- Portcullis should be represented by a soft barrier that can be easily dropped/lowered,
- Only 9’ spear and archery is permitted through the portcullis.
- Portcullis has 4 siege targets.
- Once the last target has been hit, the portcullis opens and the attackers can invade.
- The first 5’ of wall after the gate are solid, the next 10’ of the wall can be fought over.
- 2 10×10 towers on either side of the main gate and a 10’ wall section in between.
- An inner tower inside and at the back of the castle as a final defensive stand
Description:
- The number of items collected during Rapier scenario D1S3 will impact the number of arrows
each archer has during this battle.- Attacking army has unlimited resurrections
- Towers and archery follow the same rules as Scenario 2.
- Once inside the castle, archery is only limited by overall field limitations
- The results from the Live Archery Castle Defense scenario will increase the number of
resurrections that each team uses appropriately.
Victory condition: The army that uses the fewest resurrections to eliminate all defenders is the victor.
Scenario 5: Res Battle
Length and objective at the Crown(s) discretion

Hardsuit Battlefield Scenarios


